Your iPhone is more than a phone — it's a pocket-sized life vault. From cherished moments and dreamy vacation pictures to work files, messages, and apps you can't live without.
Now, imagine your iPhone slips out of your pocket and it’s never seen again. Along with your phone goes your precious photos and videos, important messages, and everything else you have on your phone. Devastating, right?
But that doesn’t mean the end of your digital world footprint, as long as you back up your phone. You can think of it as creating a safety net for your data, so that you can restore it if you lose your phone or it gets damaged beyond repair.
But how do you back up your iPhone? Let’s break down exactly how to do it.
Backing up to iCloud
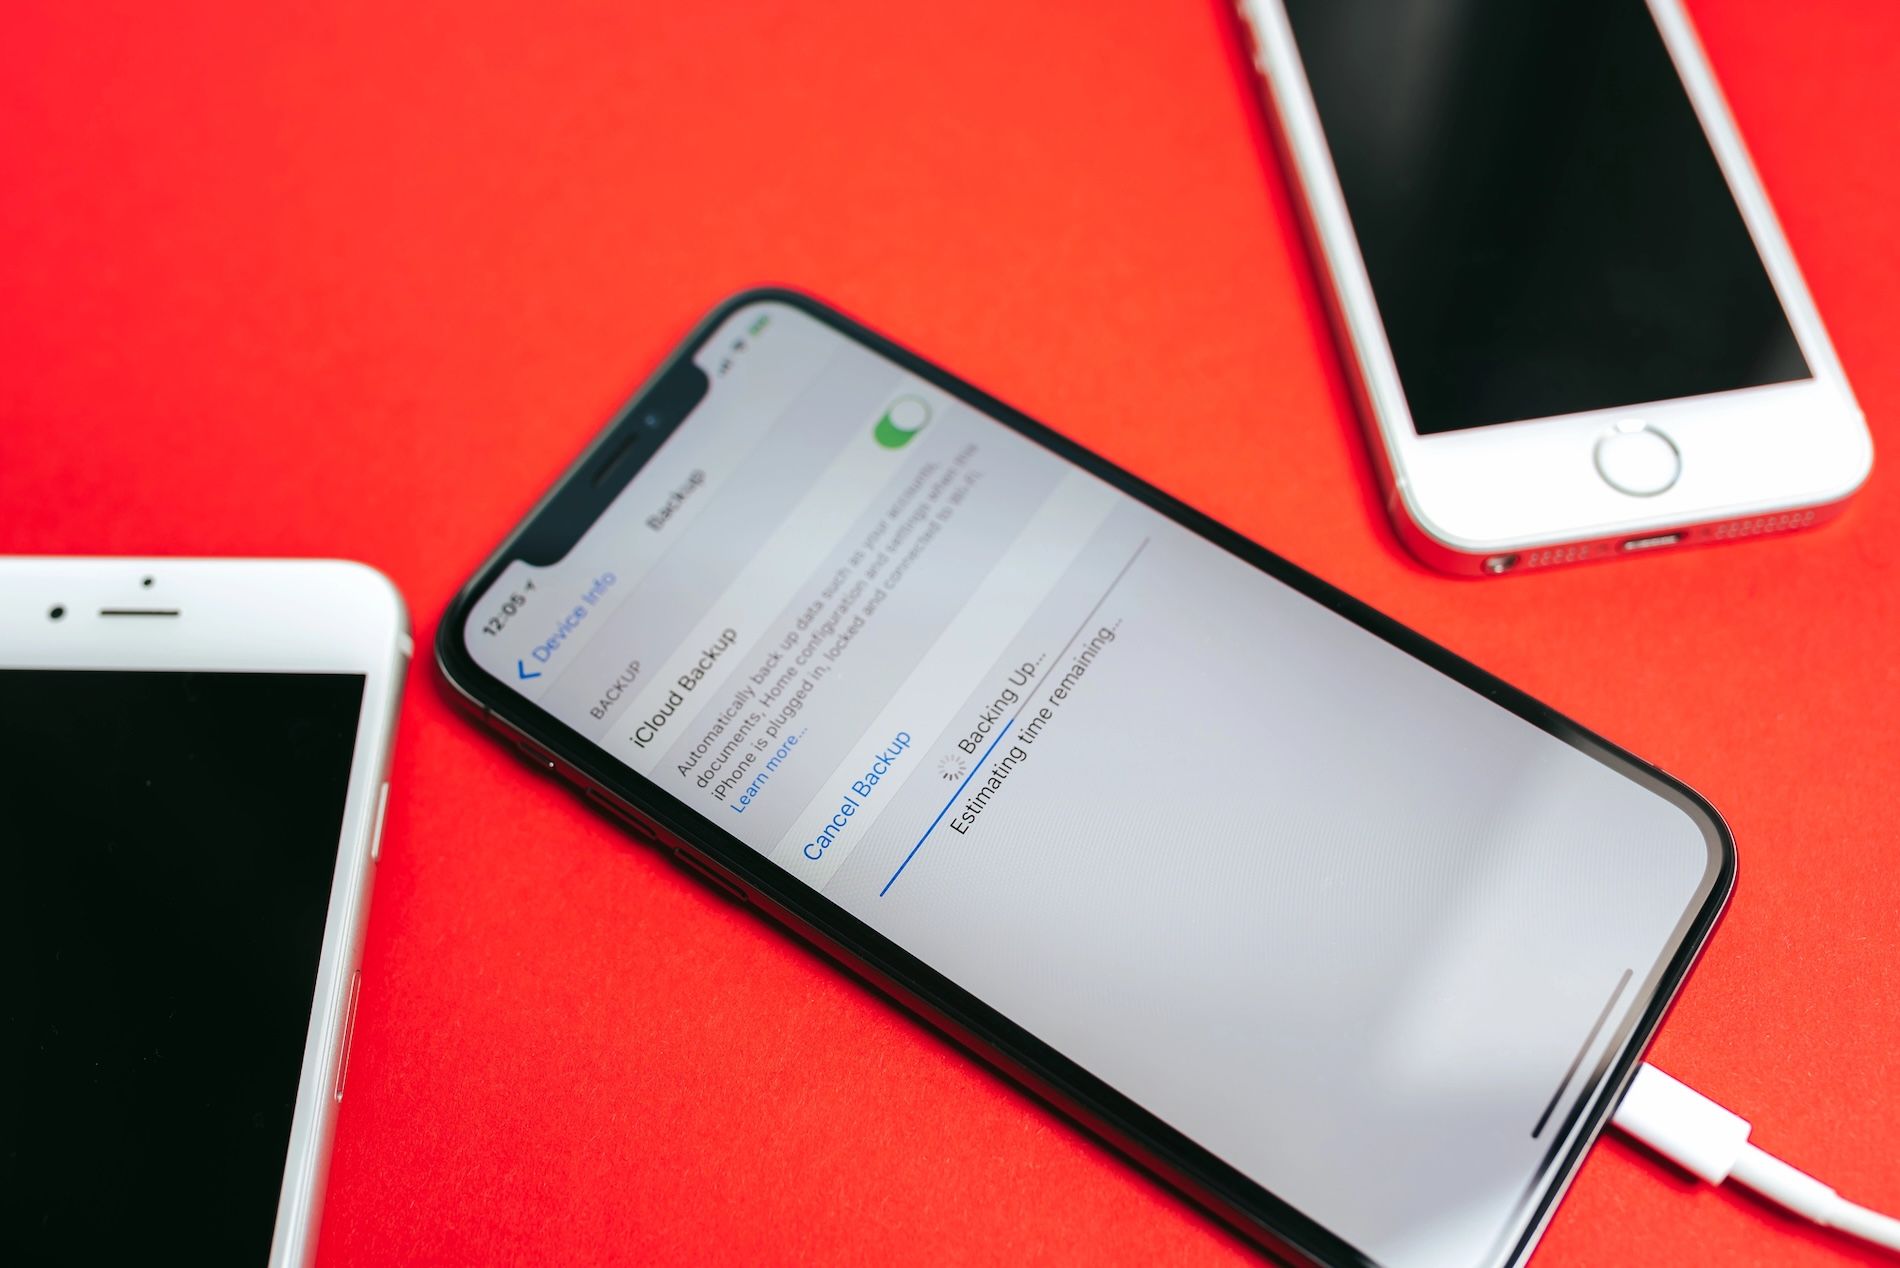
iCloud is Apple’s handy cloud storage that makes backing up your iPhone effortless. This method is ideal for users who love a good “Set it and forget it” system, as it takes care of everything quietly— you don’t even know the backup is happening. It automatically saves your data every day, whether your device is charging, connected to Wi-Fi, or locked.
This backup technique grabs all the good stuff— messages, photos, important data, device settings, app data, and more. But here’s a catch: With iCloud, you are limited to the storage space, as Apple provides only 5GB for free. If the data you are backing up needs more than that, you need to level up to iCloud+, which comes with a monthly subscription.
Here is how to back up using iCloud:
- Connect to a stable Wi-Fi network.
- Go to settings and click on your name.
- Select iCloud, then iCloud Backup.
- Enable Backup.
Backing up to a Windows PC
Are you a Windows user? iTunes is the go-to method for backing up an iPhone. While it’s no longer useful on the new Macs, it’s fully supported on Windows and provides an extensive way of managing your iPhone.
Backing up your phone through iTunes stores your data locally on your PC. This allows you to create a full device backup without worrying about cloud storage limitations.
If you are among those who don’t like uploading personal information, this method comes in handy. The local backup has everything, including app data, device settings, home screen arrangements, and iMessages.
Backing up on Windows also means you have an option to secure sensitive information with encryption. It’s a simple, fast, and reliable method.
Steps to back up your iPhone using a Windows PC:
- Get iTunes: Ensure your computer has the latest version.
- Connect your iPhone: Use a USB cable to link your iPhone to your computer.
- Open iTunes and choose your iPhone when it appears.
- Tap on the summary in the sidebar.
- Choose the backup option: Check under backups and choose your computer.
For added security, you can opt to protect your iPhone backup and set a password.
Backing Up to a Mac
Backing up to a Mac is a preferred method by individuals who want to have control over their data or don’t want to depend on cloud services. Unlike the iCloud method, Mac backups are stored locally, meaning they are only accessible on the laptop you use for the backup.
This method is a lifesaver when you have too much data but your wallet doesn’t allow you to pay for extra iCloud storage. You can also lock things down with encryption to make sure sensitive data, such as health data and W-Fi settings, is protected.
Since macOS Catalina (10.15), Apple replaced iTunes with Finder, so when connected, your iPhone will appear directly in Finder. Backups done to a Mac usually capture nearly everything on your iPhone, making it a practical method if you lose your phone or plan to reset it.
Steps to back up on Mac:
- Connect your iPhone to your Mac using a USB cable.
- Open Finder: Ensure your iPhone appears under Location in the Finder sidebar.
- Select backup option: Choose to back up all the data on your iPhone to the Mac.
- Start back up.
MacOS Mojave 10.14 or Earlier
Still rocking an older Mac with macOS Mojave 10.14 or earlier? Don’t worry, iTunes is alive and kicking, and it can still handle your iPhone backups like a champ.
Here are a few steps to back up on macOS Mojave 10.14 or earlier:
- Plug in your iPhone, open iTunes, and tap the device icon at the top left.
- Click the summary below the iPhone.
- Under backups, choose backup now: It will back up everything on your iPhone, even app data, so you won’t need to log in to all your accounts again.
- Click Encrypt iPhone backup, and set a password.
Google One
Yes, you can back up your iPhone on Google One; it’s not just for Android. While it will not copy everything on your phone like the other methods, Google One is a great option to back up videos, photos, contacts, and calendars.
Here is how:
- If you don’t have it already, download and open the Google Photos app.
- In Google Photos, turn on Backup & Sync.
- Download and open Google One.
- Go to sync settings, and turn on Backup by Google One. Set up automatic backups, and the app will automatically back up your contacts and calendar data when you connect your iPhone to Wi-Fi.
Tips for Managing and Restoring Backups
To ensure your iPhone data is always secure, it's important to level up your backup game. Making regular backups should be part of your routine. This is handy, especially before you do a major iOS update, switch to a new phone, or troubleshoot issues. You can also automate iCloud backup to run daily.
Avoid any unpleasant surprises by verifying back-ups. After backing up, check for the last successful backup time. You can access this information by going to Settings, tapping your name, clicking iCloud, and then iCloud Backup, or in Finder/iTunes if you are using a computer. It’s an ideal way to ensure your data is correctly saved.
To restore from backup, follow the guidelines as you set up your iPhone. Just choose where you want to retrieve your data from, whether it Mac/PC backup or an iCloud backup. It depends on the method you used to back up. Also, ensure the phone is connected to Wi-Fi or your laptop throughout the whole time.
Final Thoughts
Backing up your iPhone is not just a tech-savvy thing; it’s a simple but essential habit that will save you from losing irreplaceable memories and information. Whether you prefer a seamless automation of the iCloud or control of a manual backup on your PC or Mac, it gives you peace knowing that all your data is recoverable.
Picking the right way to back up your iPhone all comes down to your storage needs and lifestyle. If you are always on the go, iCloud may be the best bet. But if you prefer local and secure, backing up to a computer might be an ideal method.
In a time where our iPhones are a hub of our lives, treat your data with care, and back up!